Pumpkin painting is a delightful autumn tradition that allows you to express your creativity and add a festive touch to your home decor.
Whether you’re a seasoned artist or a beginner, these 10 pumpkin painting tips will help you create stunning designs that will impress your family and friends.
Let’s dive into the world of pumpkin painting and discover how to make your gourds truly shine this fall!
Choosing the Perfect Pumpkin
Before you start painting, it’s crucial to select the right pumpkin. Look for:
- Smooth, even surfaces
- No blemishes or soft spots
- A flat bottom for stability
Pro tip: Choose a pumpkin with a shape that complements your intended design.
Essential Supplies for Pumpkin Painting
Gather these materials before you begin:
- Acrylic paints
- Paintbrushes of various sizes
- Primer or sealant
- Paper towels
- Water cup
- Palette or paper plate
10 Pumpkin Painting Tips for Stunning Results
1. Clean and Prep Your Pumpkin

Start with a clean canvas by washing your pumpkin with mild soap and water. Dry it thoroughly to ensure the paint adheres properly.
Product suggestion: Use a gentle, eco-friendly soap like Mrs. Meyer’s Clean Day Liquid Hand Soap for cleaning your pumpkin. It’s tough on dirt but gentle on your hands and the environment.
Where to decorate: Kitchen countertop or outdoor table
2. Apply a Base Coat

Use a white or light-colored primer to create a smooth surface for your design. This step helps the colors pop and increases the longevity of your artwork.
Product suggestion: Rust-Oleum Painter’s Touch 2X Ultra Cover Paint + Primer provides excellent coverage and adheres well to pumpkins.
Where to decorate: Garage or well-ventilated area
3. Plan Your Design

Sketch your design on paper first, then lightly draw it on the pumpkin with a pencil. This step helps you visualize the final result and make any necessary adjustments.
Product suggestion: Faber-Castell Graphite Sketch Pencils are perfect for outlining your design on the pumpkin’s surface.
Where to decorate: Dining table or craft room
4. Start with Light Colours

Begin painting with lighter shades and gradually work your way to darker colours. This technique allows for easier corrections and layering.
Product suggestion: Crafts 4 ALL Acrylic Paint Set offers a wide range of vibrant colours suitable for pumpkin painting.
Where to decorate: Kitchen island or patio table
5. Use the Right Brushes

Choose brushes appropriate for your design. Flat brushes work well for large areas, while fine-tipped brushes are ideal for details.
Product suggestion: Royal Brush Soft Grip Brush Set includes a variety of brush sizes for all your pumpkin painting needs.
Where to decorate: Home office desk or craft station
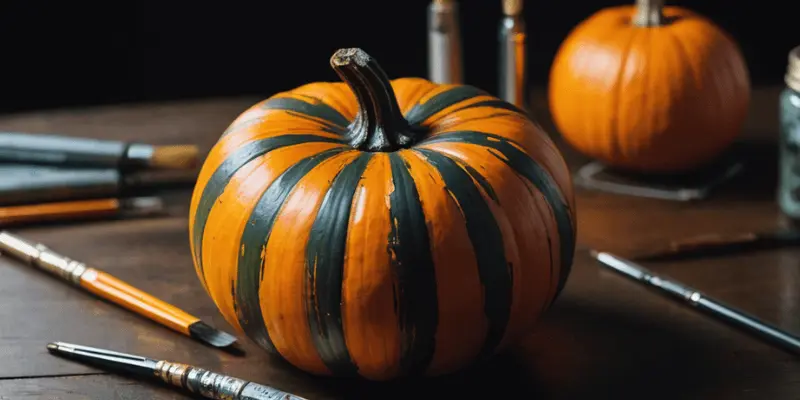
6. Create Texture

Experiment with different painting techniques to add texture to your design. Try dabbing, stippling, or dry brushing for unique effects.
Product suggestion: FolkArt Texture Paint in various finishes can add interesting dimensions to your pumpkin art.
Where to decorate: Covered porch or sunroom
7. Layer Your Colours

Build depth in your design by layering colours. Allow each layer to dry completely before adding the next for crisp, clean lines.
Product suggestion: Liquitex BASICS Acrylic Paint Set offers excellent coverage and blending capabilities for layering.
Where to decorate: Living room coffee table or balcony
8. Add Metallic Accents

Incorporate metallic paints to make your design pop. Gold, silver, or copper accents can elevate your pumpkin’s appearance.
Product suggestion: DecoArt Metallic Lustre Wax adds a beautiful shimmering effect to your pumpkin design.
Where to decorate: Entryway console or window sill
9. Seal Your Masterpiece

Once your paint is completely dry, apply a clear sealant to protect your artwork and make it last longer.
Product suggestion: Mod Podge Outdoor Water-based Sealer provides excellent protection against moisture and UV rays.
Where to decorate: Outdoor workspace or utility room
10. Embellish with Accessories

Add the finishing touches to your painted pumpkin with accessories like ribbons, glitter, or artificial leaves.
Product suggestion: Offray Ribbon and Martha Stewart Extra Fine Glitter can add that extra sparkle to your pumpkin creation.
Where to decorate: Mantelpiece or bookshelf
Best Places to Display Your Painted Pumpkins
Now that you’ve created your masterpiece, it’s time to show it off! Here are some ideal locations to display your painted pumpkins:
- Front porch
- Dining table centrepiece
- Fireplace mantel
- Window sills
- Outdoor garden areas
- Entryway console table
Remember to rotate your pumpkins regularly to prevent flat spots and ensure even drying if displayed outdoors.
Conclusion
Pumpkin painting is a fantastic way to embrace the autumn spirit and showcase your creativity. With these 10 pumpkin painting tips, you’re well-equipped to create stunning designs that will impress everyone who sees them.
Remember to have fun with the process and let your imagination run wild. Happy painting!
FAQs
How long does painted pumpkin last?
A properly sealed painted pumpkin can last 1-2 weeks indoors and about a week outdoors, depending on weather conditions.
Can I use regular craft paint on pumpkins?
Yes, acrylic craft paint works well on pumpkins. However, ensure you use a primer and sealant for best results.
How do I keep my painted pumpkin from rotting?
Apply a layer of clear sealant after painting, keep the pumpkin in a cool, dry place, and avoid cutting into it.
Can I paint plastic pumpkins?
Absolutely! Plastic pumpkins are great for long-lasting decorations. Just be sure to use paints suitable for plastic surfaces.
Is it better to paint or carve a pumpkin?
Painting is often preferred as it lasts longer and offers more design flexibility. However, the choice depends on your personal preference and intended use.


Leave a Reply